Creating a native Arm builder for Docker buildx
After spending some time with the Docker buildx system, and finding it extremely useful for building multi-architecture container images, I thought it would be fun to try and build an Arm64 platform that I can take on the road with me to do native compilation when plugged into my laptop.
The main requirements for this system are
- Only connected to the host via USB
- Powered from USB
- This sets a maximum power envelope of 0.5A
- All IO is over USB
- Gadget mode ethernet, bridged to internet via host machine
- The device should survive being unplugged without managed shutdown
- Native filesystem should be read-only (to prevent disk corruption on unmanaged power down)
- Use a ramdisk for transient storage
- Persistent storage to host machine
- The device should be powerful enough to out-perform the host machines QEMU emulation
- Could be difficult given the power budget
- But lets give it a try anyway!
Choosing an SoC to build the prototype
My original thought was that I could use a Raspberry Pi 3, I have a couple in my study so that would be ideal! But on initial inspection, it turns out that the RPi3 does not support USB OTG, which is needed for all the USB gadget requirements I have.
As luck would have it though, from a few ODroid C2’s in a pico-cluster that would seem to fit the bill. They support USB OTG, upstream kernel support is maturing well and I can power the device over the OTG port. The only problem could be the power drain, because under normal operation I believe the C2 consumes around 0.8-1.0A.
Checking the resting power consumption
This is not at all scientific, because I don’t have an inline power monitor to use, but I was successfully able to boot the device to a command prompt. This was without trimming out any of the power hungry components that I won’t need to use in the final design (HDMI, GPU, Network, …). So at this point, the prognosis looks good.
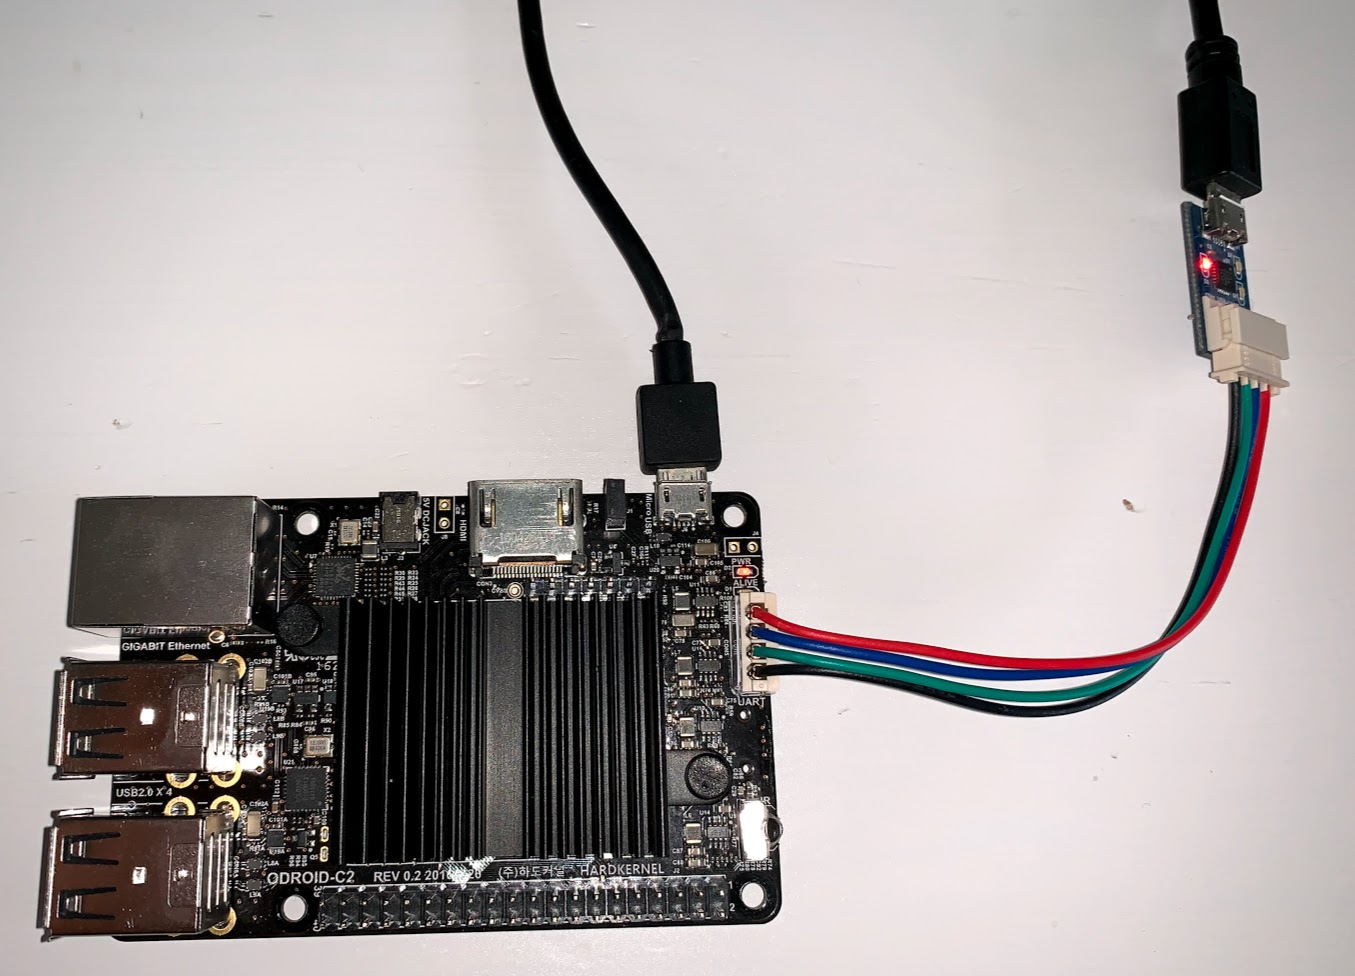
Here you can see the prototype with power and serial port connected. The serial port will not be needed in the final design, but it just makes things a bit simpler during these initial design iterations.
Choosing a suitable distro
I used armbian before in a previous docker based project, and found it to be very useful because it uses a mainline kernel. The distro that HardKernel, the creators of the ODroid use is a relatively old one that has not been updated in a while. But I soon found out that the pre-compiled kernel modules did not include g_ether.ko, the gadget mode ethernet driver that I would need.
So I had a dig around, and decided to use the original minimal distro from HardKernel. Even though it broke my requirement for an upstream kernel, it did come with the required USB gadget drivers, and instructions on how to configure it to run headless.
Stripping down the runtime
The next step was to strip down the runtime to only power up the parts of the system that are necessary. As I said before, this is not very scientific at the moment because I can’t measure it, but turning off the big ticket items that we don’t need makes a sensible first step.
All of this configuration takes place in /media/boot/config.ini, and I changed the following entries
# Server Mode (aka. No Graphics)
# Setting nographics to 1 will disable all video subsystem
# This mode is ideal of server type usage. (Saves ~300Mb of RAM)
setenv nographics "1"
There are other things you can tweak in this file, but for now this will do for me.
Setting up the USB Gadget ethernet
Getting the device configured as a ethernet gadget is fairly simple, you just need to install the g_ether kernel driver.
# Install the ethernet gadget driver
sudo modprobe g_ether

# Check that the driver is installed properly
ip address show usb0
4: usb0: <BROADCAST,MULTICAST> mtu 1500 qdisc noop state DOWN group default qlen 1000
  link/ether 2e:84:d7:a6:1a:38 brd ff:ff:ff:ff:ff:ff
Then comes the tricky part! In an ideal world, the host would be running a DHCP server listening for the device to come online and then configure it automatically for us. I will try and get that working automatically later, but for now we can do some simple static configuration.
# Give the device an IP address
ifconfig usb0 10.0.0.2 netmask 255.255.255.0

# Setup routing for this device
route add default gw 10.0.0.1

# Configure a nameserver so we can resolve hostnames
echo nameserver 1.1.1.1 >> /etc/resolv.conf
Now we need to configure the host, this is made trick because the USB gadget driver will choose a random MAC address each time it is installed, so setting up static configuration will not really be possible at the moment (you can fix the MAC address when you install the g_ether driver, but this is not ideal).
# Find out the name of the interface
dmesg | grep usb0
[129970.073344] cdc_eem 1-2:1.0 usb0: register 'cdc_eem' at usb-0000:00:14.0-2, CDC EEM Device, 26:8a:0c:3a:6f:84
[129970.093593] cdc_eem 1-2:1.0 enp0s20f0u2: renamed from usb0
so in this case, my interface name is enp0s20f0u2.
# Configure the interface
# Note, this should really be done through NetworkManager on my Fedora host
# but I am doing it quickly through the commandline just to test for now.
# The NetworkManager daemon may overwrite this at any point
ifconifg enp0s20f0u2 10.0.0.1 netmask 255.255.255.0

# Now lets test we can ping the device
ping 10.0.0.2
PING 10.0.0.2 (10.0.0.2) 56(84) bytes of data.
64 bytes from 10.0.0.2: icmp_seq=1 ttl=64 time=0.370 ms
64 bytes from 10.0.0.2: icmp_seq=2 ttl=64 time=0.318 ms
^C
Yay! That’s a working TCP/IP connection from host to device.
The last thing that needs to be set up now is the NAT routing and masquerading on the host so that it can route network traffic from the device through its internet connection.
# Make sure the kernel is configured to forward packets
sudo sysctl -w net.ipv4.ip_forward=1
net.ipv4.ip_forward = 1

# Set up a masquerading rule in our firewall
# Note, the name of my default connection is wlp58s0 (can be checked with `route`)
iptables -A FORWARD -i enp0s20f0u2 -j ACCEPT
iptables -t nat -A POSTROUTING -o wlp58s0 -j MASQUERADE
Now, pop back to our device and see if all is working
# Lets try and communicate with a server outside of my network
ping www.google.com
PING www.google.com (216.58.210.228) 56(84) bytes of data.
64 bytes from mrs04s10-in-f228.1e100.net (216.58.210.228): icmp_seq=1 ttl=54 time=16.0 ms
64 bytes from mrs04s10-in-f228.1e100.net (216.58.210.228): icmp_seq=2 ttl=54 time=16.7 ms
Conclusion
There is still a lot to do, but we now have a working device powered and connected to the internet through a single USB connection.
I will cover getting docker up and running on the device in the next post, but that is relatively simple, and then cover how we can use docker buildx on the host to target building natively on the USB device.